Durazzo
The Greeks called the city Epidamnus, the Romans Dyrrhachium.
Today, in Italian it's Durazzo, in Serbian and Croatian: Drač.
We're talking of course about the Albanian seaport city Durrës.
Reference Maps on Gaius Julius Caesar, who lived 100-44 BC
Map of Celtic Britain and Northern Gaul, 1st Century BC
Map of Gaul in the Time of Caesar
Map of Ancient Italy
Map of Asia Minor before the outbreak of the Mithradatic Wars, 90 BC
Map of Asia Minor in 63 BC
Map of Caesar's Campaign Against the Helvetii, 58 BC
Map of Caesar's Campaign Against the Belgae, 57 BC - The Battle at Mulhouse (Muelhausen)
Map of Caesar's Campaign Against the Belgae 57 BC - Initial Operations
Map of Caesar's Campaign Against the Belgae 57 / 56 BC - Operations Against the Nervii and Others
Map of the Battle of the Sabis, 57 BC
Map of Caesar's Campaigns in Gaul - Outbreak of the Gallic Revolt 54 BC
Map of Caesar's Campaigns in Gaul - Gallic Revolt Through Gergovia 53-52 BC
Map of the Siege of Gergovia - 52 BC (Part One)
Map of the Siege of Gergovia - 52 BC (Part Two)
Map of the Siege of Gergovia - 52 BC (Part Three)
Map of the Siege of Gergovia - 52 BC (Part Four)
Map of Caesar's Campaign in Gaul: From Gergovia to Alesia, 52 BC
Map of the Siege of Alesia, 52 BC
Map of the Roman Civil War, 49-45 BC
Map of the Roman Civil War, Northern Greece, 48 BC - Opening Moves
Map of the Roman Civil War, Northern Greece, 48 BC - Antony's Arrival
Map of the Roman Civil War, Northern Greece, 48 BC - Scipio's Arrival
Map of the Roman Civil War, Northern Greece, 48 BC - Movements During April
Map of the Roman Civil War, Northern Greece, 48 BC - Operations Around Durazzo
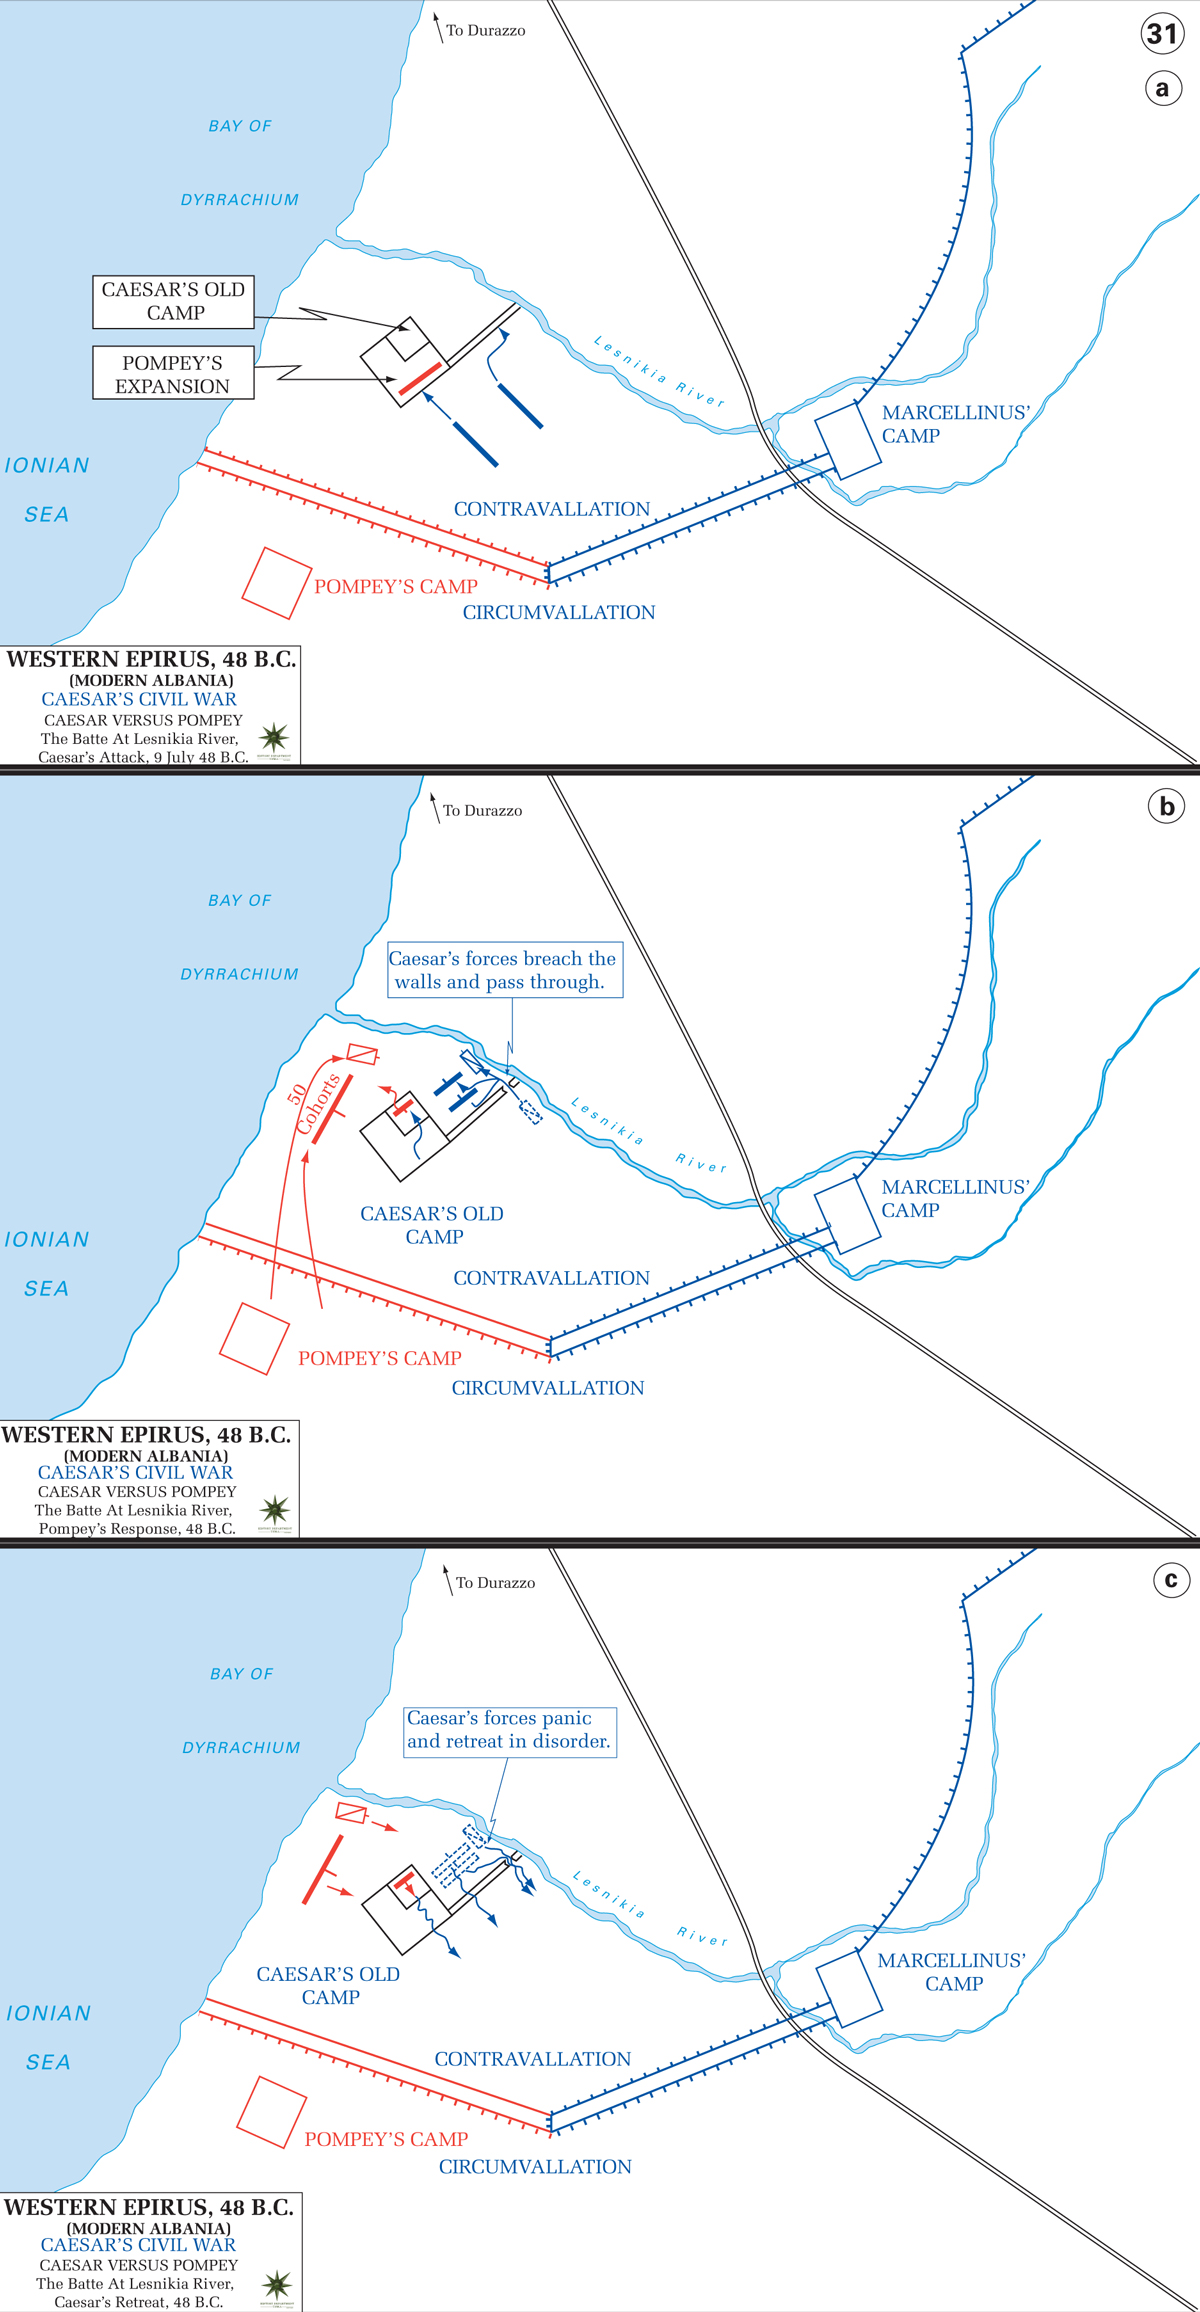
Map of the Roman Civil War, 48 BC - July 9, Battle of Dyrrachium
Map of the Moves to Pharsalus, 48 BC
Map of the Battle of Pharsalus, 48 BC
Map of the Battle of Pharsalus, 48 BC - Caesar Creates a Fourth Line
Map of the Battle of Pharsalus, 48 BC - Initial Advances
Map of the Battle of Pharsalus, 48 BC - Pompey's Cavalry Breaks Through
Map of the Battle of Pharsalus, 48 BC - Caesar's Counter-Attack
Map of Republican Rome around 40 BC
Map of Alexandria, 30 BC
Map of the Forum Romanum - Republican and Imperial
Map of Gaul in the Time of Caesar
Map of Ancient Italy
Map of Asia Minor before the outbreak of the Mithradatic Wars, 90 BC
Map of Asia Minor in 63 BC
Map of Caesar's Campaign Against the Helvetii, 58 BC
Map of Caesar's Campaign Against the Belgae, 57 BC - The Battle at Mulhouse (Muelhausen)
Map of Caesar's Campaign Against the Belgae 57 BC - Initial Operations
Map of Caesar's Campaign Against the Belgae 57 / 56 BC - Operations Against the Nervii and Others
Map of the Battle of the Sabis, 57 BC
Map of Caesar's Campaigns in Gaul - Outbreak of the Gallic Revolt 54 BC
Map of Caesar's Campaigns in Gaul - Gallic Revolt Through Gergovia 53-52 BC
Map of the Siege of Gergovia - 52 BC (Part One)
Map of the Siege of Gergovia - 52 BC (Part Two)
Map of the Siege of Gergovia - 52 BC (Part Three)
Map of the Siege of Gergovia - 52 BC (Part Four)
Map of Caesar's Campaign in Gaul: From Gergovia to Alesia, 52 BC
Map of the Siege of Alesia, 52 BC
Map of the Roman Civil War, 49-45 BC
Map of the Roman Civil War, Northern Greece, 48 BC - Opening Moves
Map of the Roman Civil War, Northern Greece, 48 BC - Antony's Arrival
Map of the Roman Civil War, Northern Greece, 48 BC - Scipio's Arrival
Map of the Roman Civil War, Northern Greece, 48 BC - Movements During April
Map of the Roman Civil War, Northern Greece, 48 BC - Operations Around Durazzo
Map of the Roman Civil War, 48 BC - July 9, Battle of Dyrrachium
Map of the Moves to Pharsalus, 48 BC
Map of the Battle of Pharsalus, 48 BC
Map of the Battle of Pharsalus, 48 BC - Caesar Creates a Fourth Line
Map of the Battle of Pharsalus, 48 BC - Initial Advances
Map of the Battle of Pharsalus, 48 BC - Pompey's Cavalry Breaks Through
Map of the Battle of Pharsalus, 48 BC - Caesar's Counter-Attack
Map of Republican Rome around 40 BC
Map of Alexandria, 30 BC
Map of the Forum Romanum - Republican and Imperial